The final items from A Charming Exchange for the charity auction going to Susan G. Komen for The Cure have been added at Ebay. This last lot includes the very special bracelet which graces the book's cover.

It is a replica of the one designed for me by my precious friend, Ruth Rae, and more loving friends when I was diagnosed with cancer. It is really such a gorgeous piece.

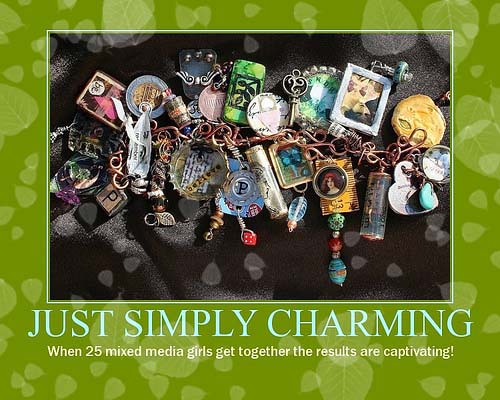
It has so many unique and amazing charms hanging from it's soft suede, pearl, and ribbon base. There's a tiny, tiny key that belonged to my grandfather. There's a miniscule light bulb shining with the word Life. There's a fine silver charm with an art tree cut into it. It is simply the most pretty bracelet you could ever have. And, if you win it you should know that this bracelet carries with it much love, blessing and light.

It will arrive in this beautiful fabric case made by Ruth.
Thank you all so much for your support in this endeavor. I've learned more about having a charity auction than you can imagine. I'll be much more informed next time around after many a hair-pulling hour. But, it has all been worth it. We've worked on this book for such a long time, with so many truly amazing artists. To be able to use the talents and gifts of us all together for good, is such a blessing.

I was thinking last night about cancer. I was thinking about how once you have breast cancer your life is changed forever in so many different ways. In some ways, it is an upside down blessing because you learn so quickly to value every second that you have. And, it seems to me to be of the utmost importance to try in every way, big and small, to help other women from ever having to fight breast cancer.

Did you know that 85% of the women who get breast cancer have No Family History of the disease? So, if you are like me, and your mom didn't have it, and your sister didn't have it, don't think that you will never get it. You don't have to be afraid but you do have to be proactive. Get screened. The mammogram is currently the best test we have to detect breast cancer. But, know that I found my cancer on my own before every having a mammogram. They're your boobs. Protect them. And the rest of your body, as well. Do self-exams, get your yearly mammogram and live your life to the fullest.